Guess who made another hip pack
I made this one with Seamly2d as well and the time spent prototyping is going down fast.
You can of course get the pattern files in my repository
With this bag I wanted to try two things:
- How's that 'binding' things all the cool kids seem to be doing these days?
- Could I make a bag that's easy to access while still having the straps attach to the front?
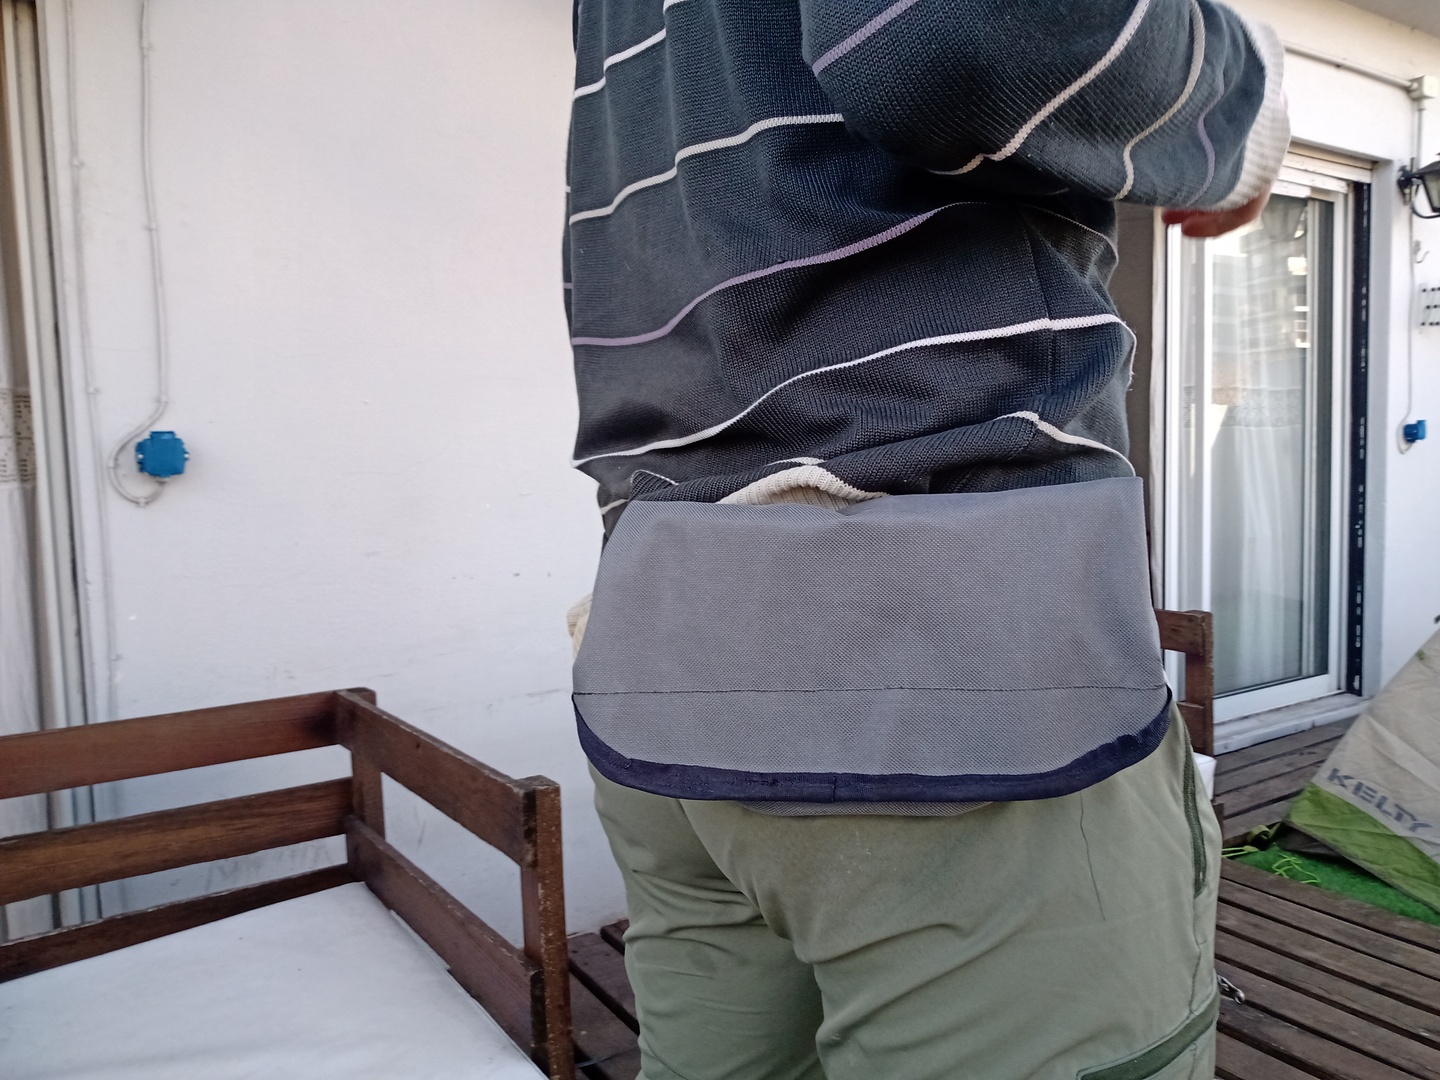

Ease of access
The measures I took to make this bag easier to use were:
- Make the bag shorter (in relation to its width) and add a front flap covering the sides, so more of the contents of the bag are exposed when opening it.
- Make it as wide on the back panel as in the front, to avoid having most of the volume in the bottom of the bag
- For the same reason, made it to have the same depth at the top of the bag as at the bottom (previously, the bag was thicker (5cm) on the bottom and narrower (2cm) at the opening)
I made the flap too wide though, so it might catch on things. We'll see.
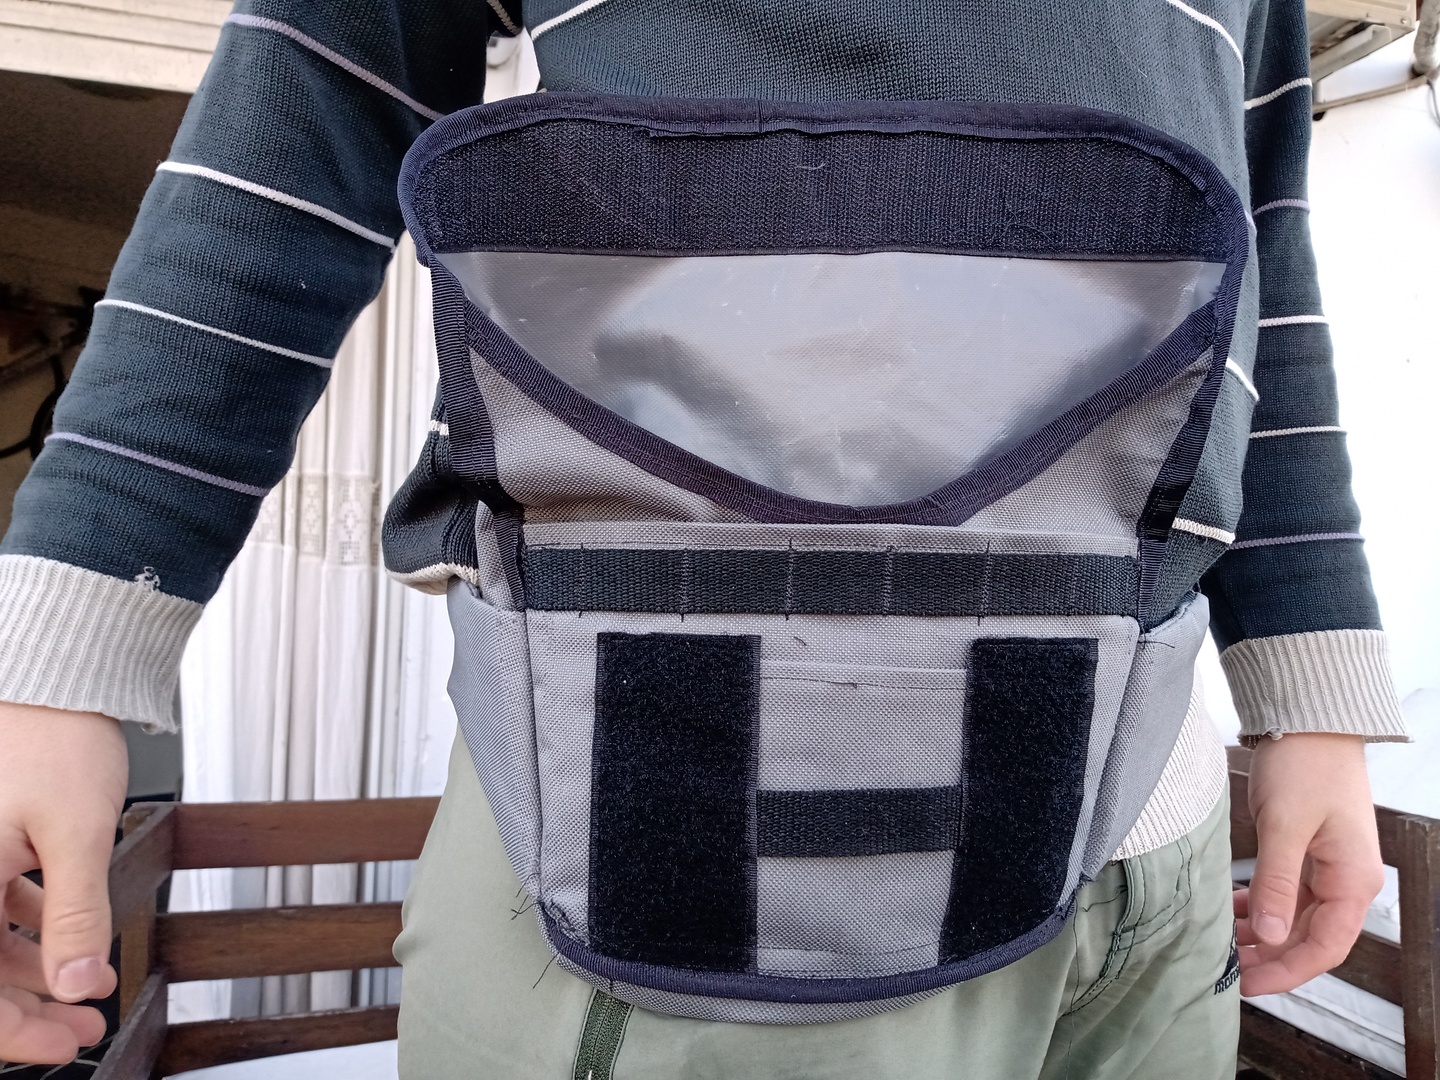
Binding
I installed the binding by doing one seam for each side, since I don't yet have a binding foot for my machine, and the result was ...okay? I mean, it stays there and is neater than just having the raw seams exposed, and doesn't look like it's going to come out anytime soon.
But on the other hand I couldn't get the binding to be even on both sides, in some places there's just enough binding on one side to cover the seam, while there's a bunch loose on the other. I guess with more practice and better use of a straight guide I could do it better, but short of an international shipment I'll do anything to try to get a 50mm two-fold binding foot that fits my machine.
You might notice the binding isn't visible near the strap attachments, and that's because I installed them incorrectly.
When tucking the seam to the inside of the bag, there's no other place for the strap attachments to be sewn but sandwiched between the front and back panel.
When leaving the seam on the outside, however, the strap attachments can be sewn over the back or front panel, and I wasn't aware of that. It should've been over the back panel, so the binding would be on a more natural angle.
I thought making the binding take sharp turns would be a problem, but I had good results so far. Procrastinating learning how to do proper curves paid off this time.
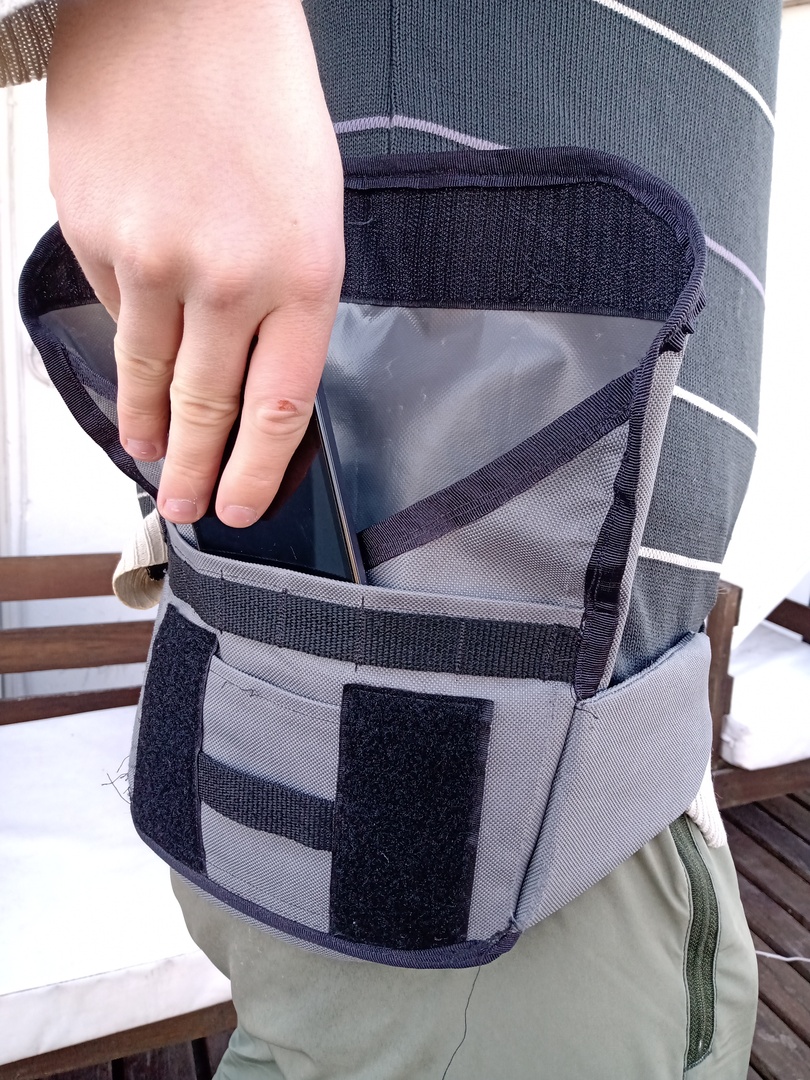
Pockets!
I've realized I could add pockets, so why not? This layout is vastly more convenient than the previous zippered one, since it adds a rather big pocket for more frequently accessed items, (it fits the usual wallet+phone+keys with room to spare) and leaving the main pocket for the bigger and less used things.
I also added a webbing-style strap at the top of the pocket with the idea of attaching a tool roll or a mini pump with some velcros, but didn't try it yet. Partly because this bag is so big it fits my pump in the inside no problem 🙃.
What's next
I'm waiting for my biggest fabric purchase so far (20 meters) and I want to try and see if using non-coated Cordura will make my garments more durable, since the threads of the coated version can't move when the needle pierces the fabric, and some are cut instead. I can actually cut through a section of fabric if I'm not careful and make a lot of stitches in one place.
I might take another swing at curves, using ellipses/circles instead of Bezier curves, which I couldn't figure out how to make matching pieces out of.
Also, you might've seen this bag doesn't include a lining. I'll probably try to make a lined bag where the outer & lining fabric are sewn together at the binding. I didn't attempt to do this in this iteration since I didn't know how would my machine fare with sewing a few layers of Cordura + binding.